Log In
Register
Forums
Crossfire Forum
Crossfire Events and Meets
New Member Introductions
Site News
Cars
All Crossfires
Crossfire Coupe
Crossfire Roadster
Crossfire SRT6
Crossfire V8 conversions
MB SLK/SL/SLC
Technical
TSBs and How-To Articles
Troubleshooting & Technical Questions & Modifications
Engine, Exhaust, Transmission and Differential
Audio, Video and Electronics
Exterior & Lighting
Interior
Wheels, Brakes, Tires and Suspension
Detail Shop
Competition
Crossfire Awards and Trophies
Racing
Car Shows
Marketplace
Crossfire Marketplace
Commercial Sponsor Classifieds
Off Topic
General
Other Cars
Other Vehicles
Regional Forums
North America
Other Regions
****Forum Functions**** / Test / Troubles / Suggestions etc
**WEBSITE** Functions / Questions/ Suggestions Etc
Testing Section Only
Gallery
Tools
Car Payment Calculator
Tire Rim Calculator
Vin Decoder
Recalls
Technical Service Bulletins (TSBs)
Members List
Live Feed
Marketplace
Vendor Directory
Become a Vendor
The Crossfire Marketplace
New Posts
View Dark Mode
Please register or login to enable Dark Mode.
Log In
Register
Threads
Google
Threads
Posts
Advanced
Dark Mode
Please register or login to enable Dark Mode.
Log In
Forgot your Password?
By logging into your account, you agree to our
Terms of Use
and
Privacy Policy
, and to the use of cookies as described therein.
Recent
Commented
Albums
My Pictures
My Post Pictures
WD40
June 7, 2019
263
2
Sort:
Default
Default
Most Recent
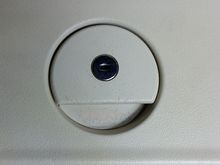
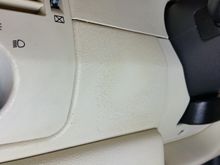
The sight which spurred me to action. Notice the nail-chips extended up even on the pull-out portion.
0
2022/06/02 18:21:16
53735
Which you can see more clearly by looking at an enlarged view of this shot.
0
2022/06/02 18:21:20
53735
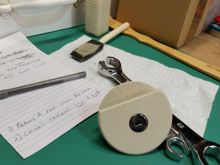
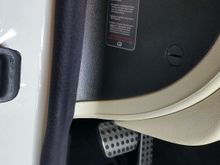
The latch is held on by two T15 screws accessed from the back-side.
0
2022/06/02 18:21:22
53735
I applied this product with foam brushes I bought at Harbor Freight Tools, but a selection of small, 'normal' brushes would have worked just as well.
0
2022/06/02 18:21:24
53735
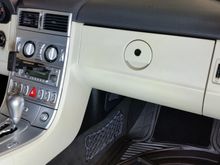
And the final product, muy bien! Time well spent.
0
2022/06/02 18:21:30
53735
0
2022/06/04 00:18:31
53735
0
2022/06/04 00:18:33
53735
0
2022/06/04 00:18:35
53735
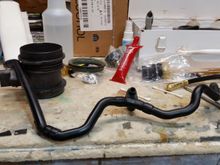
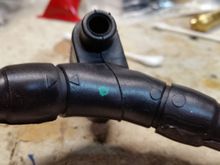
You can assemble the new breather hoses together on your workbench as Mercedes has placed TRIANGLES, SQUARES or CIRCLES on the ends and simply aligning them gives you the correct hose orientation. Good going Mercedes!
0
2022/06/04 00:18:37
53735
0
2022/06/04 00:18:39
53735
0
2022/06/04 00:18:41
53735
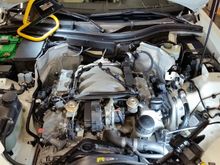
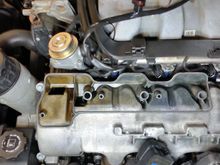
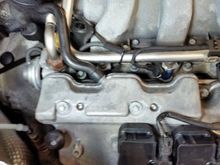
OK, so here I am about to remove the 2 breather covers. This shows everything I had to remove, including the MAF as the breather hoses route the air back into the intake manifold via a fitting that's impossible to get to without removing the MAF.
0
2022/06/04 00:38:38
53735
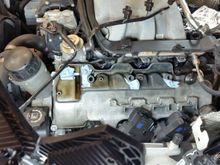
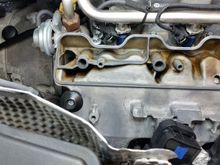
I plugged the open holes with blue shop towels so nothing would fall onto the camshafts while I cleaned the sealing surfaces.
0
2022/06/04 00:38:40
53735
0
2022/06/04 00:38:42
53735
Here are the 2 breather covers all cleaned up & ready to be reinstalled.
0
2022/06/04 00:38:44
53735
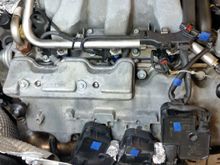
And both cam covers all clean as well.
0
2022/06/04 00:38:46
53735
0
2022/06/04 00:38:48
53735
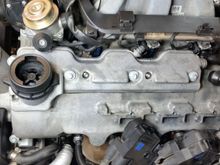
Here we are with the breather covers reinstalled...
0
2022/06/04 01:01:16
53735
0
2022/06/04 01:01:18
53735
And the rest of the job is merely putting what you took off back on, but with brand-new breather hoses.
0
2022/06/04 01:01:20
53735
0
2022/06/04 01:01:21
53735
0
2022/06/04 01:01:23
53735
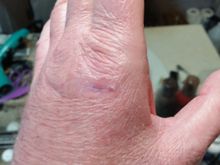
About 18 hours after the injury.
0
2022/06/10 22:14:40
53735
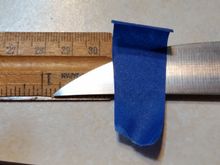
Based on the width of the cut, this is how much of the knife went through my skin.
0
2022/06/10 22:14:43
53735
0
2022/06/20 17:02:55
53735
0
2022/06/20 17:02:58
53735
0
2022/06/20 17:02:59
53735
0
2022/06/20 17:03:00
53735
0
2022/07/04 23:20:44
53735
0
2022/07/04 23:20:48
53735
0
2022/07/04 23:20:51
53735
0
2022/07/04 23:20:54
53735
0
2022/07/04 23:26:22
53735
0
2022/07/04 23:26:27
53735
0
2022/07/04 23:30:06
53735
0
2022/07/04 23:30:10
53735
0
2022/07/04 23:30:12
53735
0
2022/07/04 23:30:16
53735
0
2022/07/04 23:30:20
53735
0
2022/07/19 12:51:22
53735
First
Page
5 of 7
Last
Go To
Page
1
2
3
4
5
6
7
5 of 7
Go To
GO
Go to page
of 7
pages
1
2
3
4
5
6
7