
Check these out


I havent gotten mine yet and so havent looked closely to see where to mount them.... I did get my LED yesterday... only ONE....they forgot to put two in the package and now I have to wait for the second one........ the resistors aren't here yet, so I guess it's no big deal...

Originally Posted by hcarter
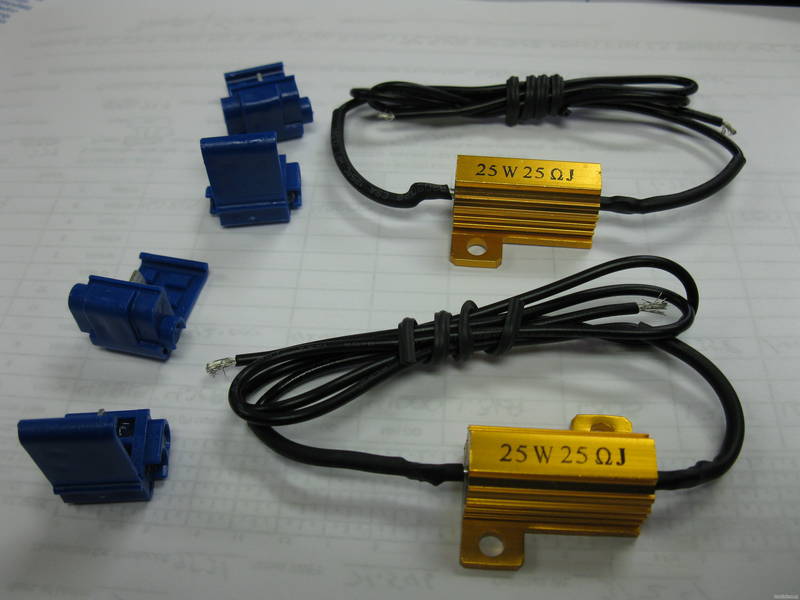
Just recieved the resistors ,does anyone know if I can mount these in the trunk as long as they are in the right wiring , they may heat up a little and i dont want them against any thing Thoughts please ?? 
Just my Dos Centavos !

Originally Posted by Stogey
I have only one suggestion and that is NOT to use the blue wire locks ! Eventually they loosen and you will have issues with flickering lights or lights out all together. Better to clip the wire, solder the joints together and use shrink wrap on the joint.
Just my Dos Centavos !
Just my Dos Centavos !
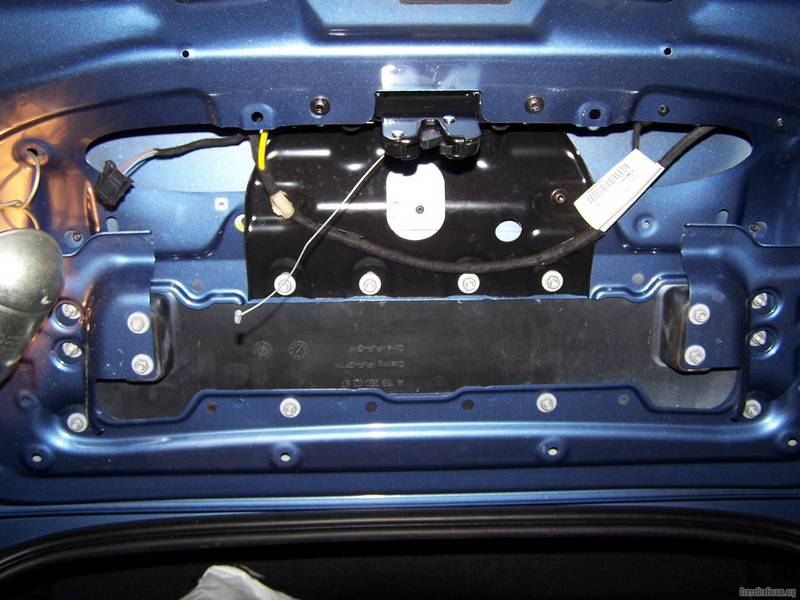
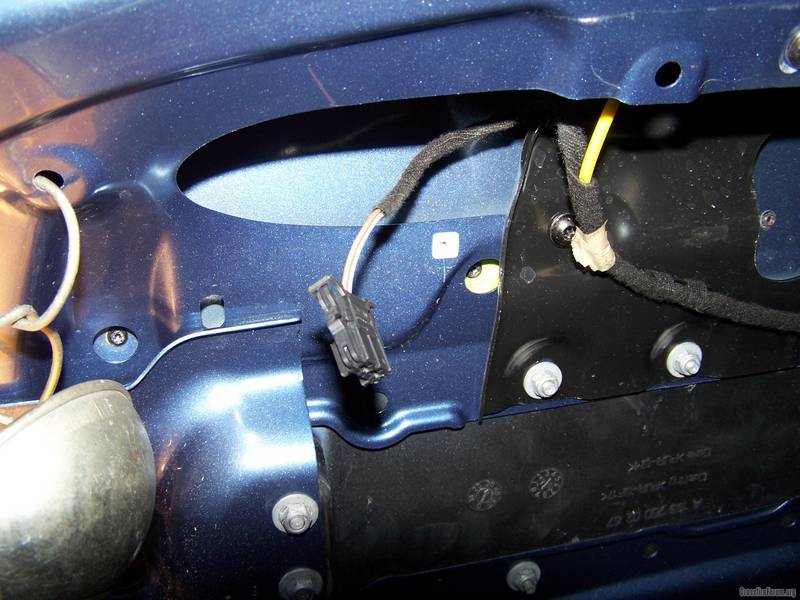
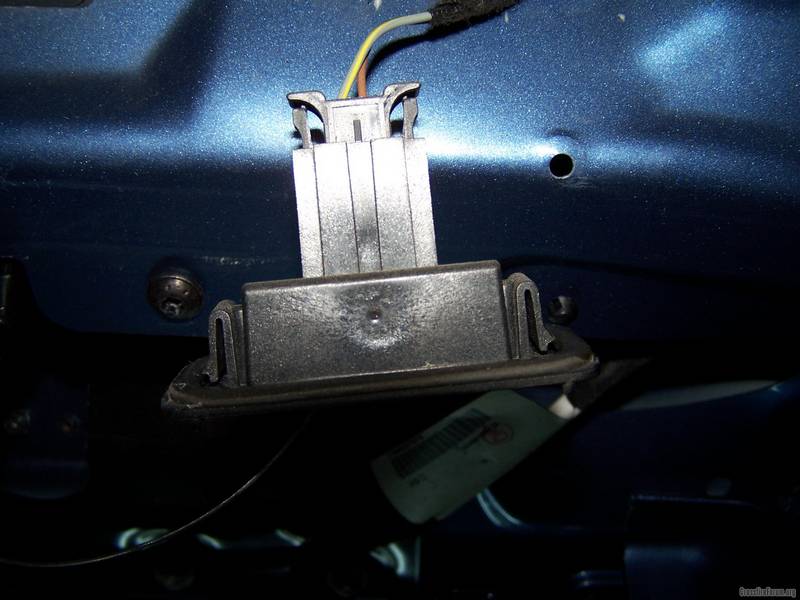
Up date on the resistor install for tag Hid's ,,Left hand side no problem easy to get to the plug (even with my big fat hands ) right hand side is another matter though . I had to remove the light assembly ( because all of the lock assembly wires etc are on that side ) it really does pop out ( flat head screwdriver working gently all the way around housing ) and then it's a snap to get to everything for install of resistors .....Here are some pictures with everything taken apart . too many things going on tonight to wire it up so looks like it will be tomorrow night ,Also i need to figure where i'm going to put the resistors ( several places look pretty good ) .....Ideas

Last edited by hcarter; 12-08-2009 at 03:24 PM.
Mike , I was reading a note on the instilation sheet that said these can generate heat . to place away from plastic or painted surfaces I'm thinking about bolting them on small alluminum pads and then using 2 emblem tape ..,And yes the open pockets are the perfect place.
Yep, that is why they have big heatsinks... The small pads are a good idea. Mount them on the inside of the pocket, not the outside. Then you wont have to worry about any discoloration, if there is any. Or put a piece of heat insulation between the body and heat sink and screw them down. It is going too be covered by the window trim, so there should be room for the screws and they will be covered.
")
Got the resistors installed and they work fine no Bulb Out indicator now,,,, all is fine  ,They do get pretty warm but as long as they are placed in the right location that shouldnt be a problem ,,,I have taken some pictures of where they are mounted but for some reason when I try to upload them i get a error code 127 sent a message to CF.ORG
As soon as i'm able I will share the pics......
Howard
sent a message to CF.ORG As soon as i'm able I will share the pics......
Howard
Senior Member
I made two aluminium housings that replaces our heat cracked plastic tag lights. When using a single 3/4" diameter LED light for each side,the light out would stay on. Throwed'em in the dumpster. Sooooo I then made up a dual angled housing fitted with two 3/4 red LED's for each side. No light out indicator now and no resistors! Even though they're out of sight,I painted the aluminium housings to match the car. Just to look cool when the trunk is open. Looks like the back of the car is on fire with the 4 LED's shinning thru the cold exhaust moisture. Should have a very long life being there rated for 14 volts and pull .05 amps each. Used on new18 wheeler's for marker and clearance. 3/4 " sealed 1 diode pattern. Truck-Lite 33250R Model 33. Squirrel Crusher
Last edited by Squirrel Crusher; 12-12-2009 at 12:17 AM.


I got my LED's plate lights installed and turned them on..... no light... Pull LED and check voltage, yep 13V....hmmmm..... Oh yeah, this is NOT a light bulb. Turn LED end for end and plug back in.... dang..those are bright!
Howard, I was trying to figure out why your hatch looked different than mine. Then I checked your signature and see you have a roadster. I was able to mount my resisters on the back side of the frame. Drilled a .136" hole(6-32) in the frame, tapped the resister mounting hole for 6-32 screw and then used blue loctite on the screw. I think I will add some heat shield to the outside surface of the hatch above the resistor. Those are even hotter than I thought they would be. There is plenty of room around the resistor where I have it mounted, but I would like some insurance on the outer surface for my paint. I'll post pics when they fix the gallery.
Howard, I was trying to figure out why your hatch looked different than mine. Then I checked your signature and see you have a roadster. I was able to mount my resisters on the back side of the frame. Drilled a .136" hole(6-32) in the frame, tapped the resister mounting hole for 6-32 screw and then used blue loctite on the screw. I think I will add some heat shield to the outside surface of the hatch above the resistor. Those are even hotter than I thought they would be. There is plenty of room around the resistor where I have it mounted, but I would like some insurance on the outer surface for my paint.
COOL I 'm glad you got them going , They do look nice don't they ,,yes the mounting on mine was pretty simple. There's a nice air gap under them with the light housing ,AND yes they do get pretty warm ...You can post the picks in your picture albums over at CICCI and link them back here Pics load fine over there ,,,I would like to see the mounting....
Howard
Howard
Okay, here are the links to the pics on my CICCI gallery..
http://www.crossfireinternational.co...9_5_34_49.jpeg
http://www.crossfireinternational.co...9_5_35_09.jpeg
http://www.crossfireinternational.co...9_5_35_33.jpeg
http://www.crossfireinternational.co...9_5_34_49.jpeg
http://www.crossfireinternational.co...9_5_35_09.jpeg
http://www.crossfireinternational.co...9_5_35_33.jpeg

Thread
Thread Starter
Forum
Replies
Last Post
janaiy
Engine, Exhaust, Transmission and Differential
53
11-02-2015 09:23 PM
Currently Active Users Viewing This Thread: 1 (0 members and 1 guests)