
SL55 "Y" & hose install w/pic's & results


I done my install this weekend, to keep any possible restrictions down this is what I used. 2 ea 2.75 ID semi-truck radiator hose's 40mm long & 2 ea 2.5 semi-truck radiator hose's just wide enough to fit the notch of the OEM air boxes. I also used 2-3/4 piece's of exhaust pipe inside the 2.75 hose's to keep them from collapsing when inserting them into the SL55 hose's. Since the SL55 hose's are oval the round hose's I was using did not want to fit correctly, so after getting them in the best I could I used a little hand held bar clamp to reshape them to the oval position. Then the 2.75 hose fit like a glove, I then put the hose clamps on & tightened them down snug. After that I used the clamp to make them round again. I ended up having to trim a little off the corner of the lower portion of the air box, it already had a notch there. I tried to do the install with one air box left on the car, installing the "Y" then the second air box, but the smaller hose's I'd put on the air boxes kept slipping out of the big hose's. Soooo, after getting things together the best I could on the car I pulled both air boxes with the "Y" & hose's all clamped together. I sat the whole thing on the bench to make adjustments and make sure the small peice's of hose's were in place good. I then tried to mount it back on the car but the big hose's were hitting the supercharger screw covers. So I pulled the whole thing back off and used the bar clamp to bend the large hose's that have the peice's of exhaust pipe in them for reinforcement to an oval shape. The gains I got on a G-Tech meter were .162 @ 3.16 mph in the 1/8th & .362 @ 3.76 mph in the 1/4, 0 to 60 4.316 to 4.110. The G-Tech will give you a HP & TQ readings also, it showed a gain of 27 hp & 19 tq from my best previous run, but these gain also include removing the resonator.
Some pic's of the G-Tech meter & a few others. These runs were done by just letting off the brake & flooring it with the TC on, anybody that has driven an SRT6 knows you can get a better launch by gradually flooring it. You can tell there were basiclly no differences in the 60' mark, so I do believe with some launch practicing I could break into the 11's on the G-Tech meter. The first 2 G-Tech pic's are before & the second two are after the install.
Last edited by Steve Hellums; 11-19-2007 at 08:22 AM.

Senior Member
Join Date: May 2007
Location: Bayou Vista, TX
Age: 41
Posts: 1,325
Likes: 0
Received 0 Likes
on
0 Posts
Senior Member
Originally Posted by ShawnQ
Nice write up!
I am waiting on cool/dry air to get back to the drag to do a before/after on my SL55 Y-Pipe.
I still don't believe the dyno...but the track will tell for sure.
You need to get that car on a track!
I am waiting on cool/dry air to get back to the drag to do a before/after on my SL55 Y-Pipe.
I still don't believe the dyno...but the track will tell for sure.
You need to get that car on a track!
Senior Member
Join Date: Jun 2006
Location: Lakeville, MN/ River Falls, WI
Posts: 1,613
Likes: 0
Received 1 Like
on
1 Post
If you take those tubes off you will loose 21 hp there is a dyno on MB world as for going larger even though more air is coming it is still going to be ristricted as soon as it hits the air filters. IF your looking to keep everything looking stock you should run the VRP air box AND sl set up thats the only way to see the gain your looking for unless of coarse you go the needswings route.
Originally Posted by Steve Hellums
The next step is opening up the restrictions on the ends of the intake tube's in the radiator support. I'm going to make the ends of the intake tube's as big as possible and use some type of 45 & cut a bevel end on it so it's not straight foward
Originally Posted by jonnyangel04
If you take those tubes off you will loose 21 hp there is a dyno on MB world as for going larger even though more air is coming it is still going to be ristricted as soon as it hits the air filters. IF your looking to keep everything looking stock you should run the VRP air box AND sl set up thats the only way to see the gain your looking for unless of coarse you go the needswings route.
Originally Posted by BrianBrave
The SLK32/C32 folks who have installed the SL55 V8 airbox use a dremmel and enlarge the openings at the radiator supprt (the SL55 intake tubes are larger then our stock ones) and attach the new intake tubes to the support with a fastener
Senior Member
Join Date: May 2007
Location: Bayou Vista, TX
Age: 41
Posts: 1,325
Likes: 0
Received 0 Likes
on
0 Posts
Originally Posted by Steve Hellums
It's just my opinion, but I think I can deliever more air with 2 - 2.25" to 2.5" pipes than 1 - 3 inch pipe.
SQ
Originally Posted by ShawnQ
NeedsWings agreed with this - but, from what he said, the air that the single 3" is supplying is more than enough for the car - so basically the only advantage you will gain from the dual pipes is looks (which is what we are after, retain the somewhat stock appearance). The added air wont really benefit because it is more than the engine can use.
SQ
SQ
Senior Member
Join Date: May 2007
Location: Bayou Vista, TX
Age: 41
Posts: 1,325
Likes: 0
Received 0 Likes
on
0 Posts
The Y beneath the intake is for the intercooler.
Take a look at HDDP's SRT Engine Transplant thread. He has some pics of his torn apart, and it helps to look at them if you are trying to see how it all works. It's a pretty in-efficient design, to be honest...but it is what it is.
SQ
Take a look at HDDP's SRT Engine Transplant thread. He has some pics of his torn apart, and it helps to look at them if you are trying to see how it all works. It's a pretty in-efficient design, to be honest...but it is what it is.
SQ


Originally Posted by Steve Hellums
I done my install this weekend, to keep any possible restrictions down this is what I used. 2 ea 2.75 ID semi-truck radiator hose's 40mm long & 2 ea 2.5 semi-truck radiator hose's just wide enough to fit the notch of the OEM air boxes. I also used 2-3/4 piece's of exhaust pipe inside the 2.75 hose's to keep them from collapsing when inserting them into the SL55 hose's. Since the SL55 hose's are oval the round hose's I was using did not want to fit correctly, so after getting them in the best I could I used a little hand held bar clamp to reshape them to the oval position. Then the 2.75 hose fit like a glove, I then put the hose clamps on & tightened them down snug. After that I used the clamp to make them round again. I ended up having to trim a little off the corner of the lower portion of the air box, it already had a notch there. I tried to do the install with one air box left on the car, installing the "Y" then the second air box, but the smaller hose's I'd put on the air boxes kept slipping out of the big hose's. Soooo, after getting things together the best I could on the car I pulled both air boxes with the "Y" & hose's all clamped together. I sat the whole thing on the bench to make adjustments and make sure the small peice's of hose's were in place good. I then tried to mount it back on the car but the big hose's were hitting the supercharger screw covers. So I pulled the whole thing back off and used the bar clamp to bend the large hose's that have the peice's of exhaust pipe in them for reinforcement to an oval shape. The gains I got on a G-Tech meter were .162 @ 3.16 mph in the 1/8th & .362 @ 3.76 mph in the 1/4, 0 to 60 4.316 to 4.110. The G-Tech will give you a HP & TQ readings also, it showed a gain of 27 hp & 19 tq from my best previous run, but these gain also include removing the resonator.
You have done this slightly different to the way I am doing mne. I don't need to "Pad" the Airbox like you did with some pipe. I have fitted a 6mm wall hose inside the SL55 pipe and it fits straight onto the airbox. Also I have used a Stainless Steell ring to clamp onto to fit the 2 pipes together.
What you have done looks really neat too. Good to hear the performance and sound improvement too. Can't wait to actually fit mine at the weekend, weather permitting. I thought I was going to be the first with this mod, but the weather let me down and you beat me to it. Well done.
Si
Originally Posted by simon-srt6
Hi Steve,
You have done this slightly different to the way I am doing mne. I don't need to "Pad" the Airbox like you did with some pipe. I have fitted a 6mm wall hose inside the SL55 pipe and it fits straight onto the airbox. Also I have used a Stainless Steell ring to clamp onto to fit the 2 pipes together.
What you have done looks really neat too. Good to hear the performance and sound improvement too. Can't wait to actually fit mine at the weekend, weather permitting. I thought I was going to be the first with this mod, but the weather let me down and you beat me to it. Well done.
Si
Senior Member
Join Date: May 2007
Location: Bayou Vista, TX
Age: 41
Posts: 1,325
Likes: 0
Received 0 Likes
on
0 Posts
Originally Posted by Steve Hellums
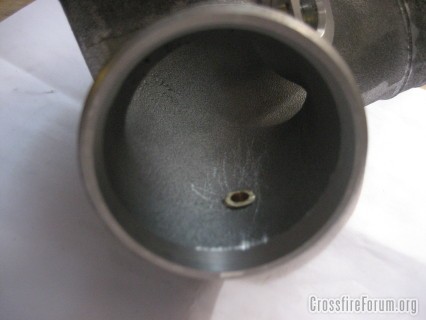
I pulled out my grill last night to check out what size hole the end of the intake tube's fit into. They are oval shaped measuring about 2" tall & 1" wide. I knew they were small because I had noticed them when I had my grill out last winter, but I didn't relize they were that small. They equal out to about an 1-1/2" to 1-3/4" ID round hole. I was going to wait till this winter to make improvements there, but I think I'm going to go ahead and do it this weekend. I hope the gains are as good as the SL55 "Y" & hose's.
Let us know how you end up increasing the intake size...that seems like a big bottleneck at this point.
SQ
Forum Regular
Join Date: Jan 2006
Location: Columbus, GA/Panama City Beach
Age: 58
Posts: 787
Likes: 0
Received 0 Likes
on
0 Posts
Originally Posted by ws6vert
Yes I took my grill off also. What are people doing there with a cai such as Needswings? Is that removed or squeezed in that 1"x2" opening?

Thread
Thread Starter
Forum
Replies
Last Post
leaddog2015
WTB - Items/Parts Wanted to Buy - Archive
0
07-24-2015 10:13 PM
Sweet2002
Crossfire SRT6
6
07-24-2015 07:57 PM
Currently Active Users Viewing This Thread: 1 (0 members and 1 guests)